From my Notebook >
How to Draw Arrows in KolourPaint
KolourPaint is a very simple and effective drawing tool. However, some of the tricks for using it well are not so obvious.
In this step-by-step tutorial, I’ll show you how to quickly draw arrows—particularly arrowheads—in KolourPaint.
Note: In this tutorial, I am using anti-aliased drawing, for smooth lines. If you’d rather use pixel-style lines, you can toggle this setting in: Settings -> Draw Anti-Aliased.
1. Draw Your Lines
First, if your arrowhead will go at the end of a line, draw your line with the line tool.
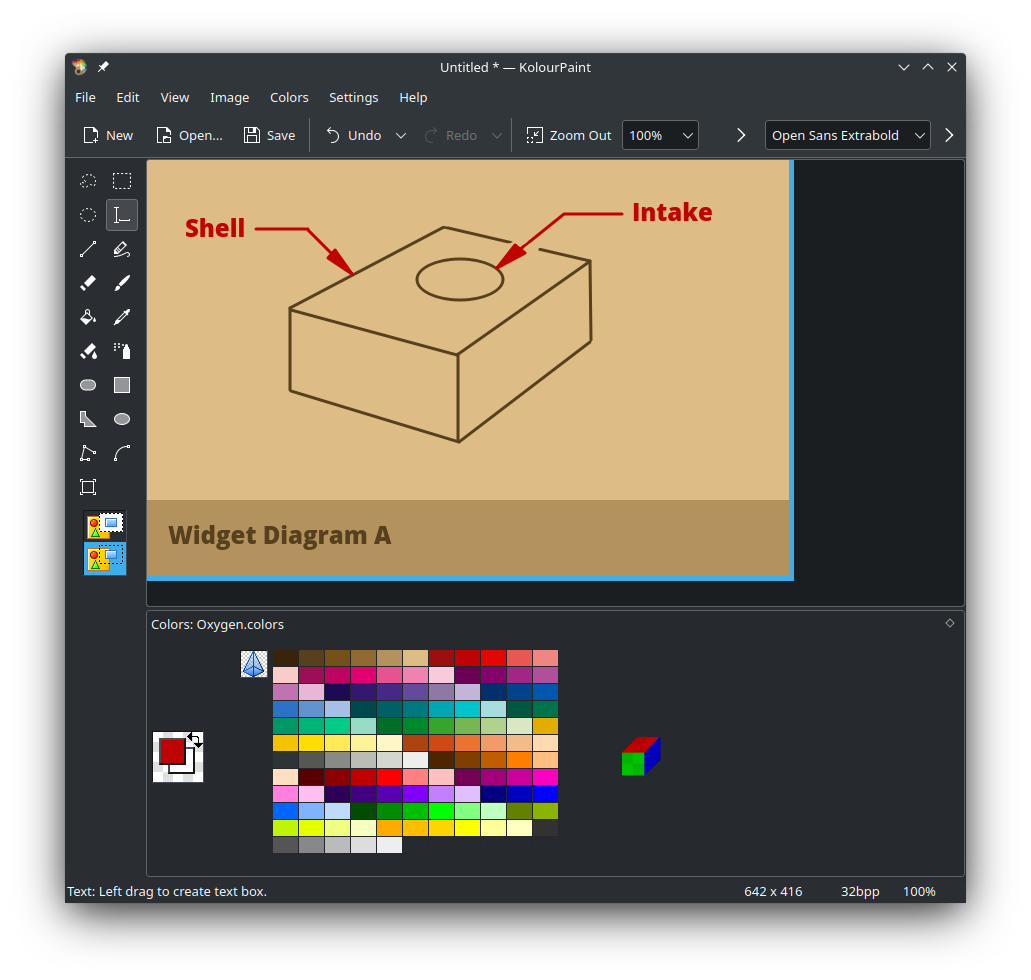
Here is my starting line, the red line at the right side of the image. I’ve already added a complete arrowhead to the line on the left side.

2. Switch to the Polygon Tool, Select Color & Fill, and Start the Arrow At the Back Point
- Select the Polygon Tool by clicking the Polygon Tool in the toolbar, or by pressing “g” on your keyboard.
- Choose the color of your arrow tip from the color palette at the bottom of the KolourPaint window.
- Choose the width of the arrow outline in the left sidebar. If applicable, choose the fill as well (I use the third option, for a solid fill)
- Zoom in on your image (Ctrl + Mousewheel) if you want to work more precisely.
Now start drawing the arrow by making the first point:
- Pick a good point where the arrow will start on the line. (This will be the back of the arrowhead)
- Offset your mouse cursor away from the line a bit, and click once with the left mouse button (LMB).
The result of step 2 should look like this. I have added a yellow circle so you can see it easily, since it’s a tiny point:

3. Create the Second Back Point of the Arrow
- Move your cursor directly across the line.
- Click again with the left mouse button (LMB), creating the second point of the arrow.
- You should now see a highlighted line between polygon points 1 & 2. Please zoom in to see it better.
The result of step 3 should look like this:

4. Create the Tip of the Arrow
- Move your cursor to location where you want the tip of the arrow to go, and press the left mouse button (LMB).
The result of step 4 should look like this:

5. Finish the Arrow
- Click the Right mouse button (RMB) to tell the polygon tool, “I’m done”. (This step will not draw anything extra)
- If you are not drawing a filled-in arrowhead, you’ll notice that this will automatically connect the first and third points of the triangle.
- You should now see the completed arrowhead. Nice!
Feel free to continue drawing or adding text labels, as I’ve done in the image below.
The result of step 5 should look like this:
Good job if you made it this far! That’s the end of the tutorial.
Bonus Exercise?
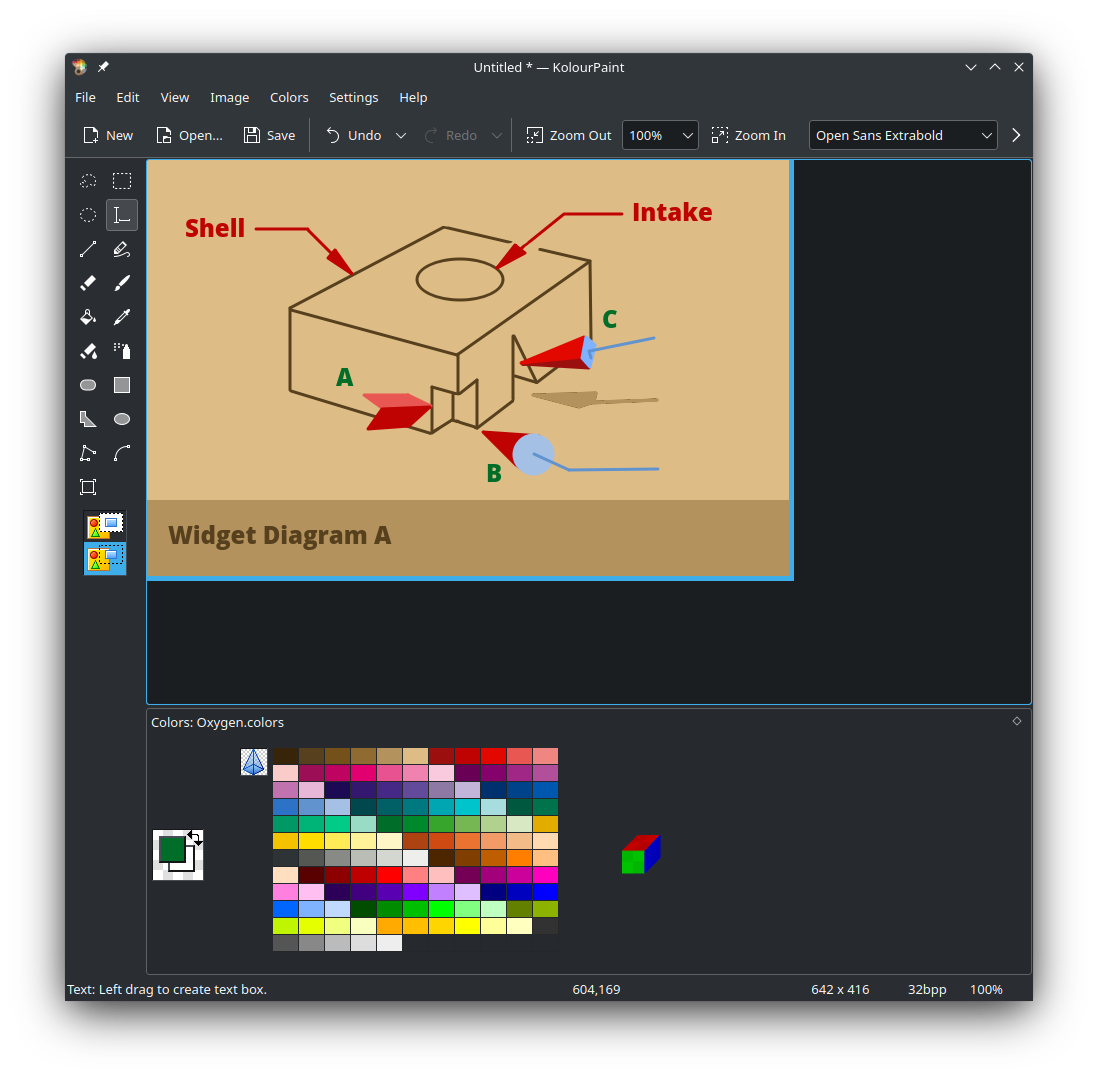
Interested in more arrow experiments? See if you can figure out how to use the polygon tool to draw arrows A, B, and C, here:
And for the more advanced level, what about integrating other software? You can try using some GIMP tools, the Free Select Tool (“u” key) and Gradient (“g” key) tools to create more 3D depth and visual interest, like this:
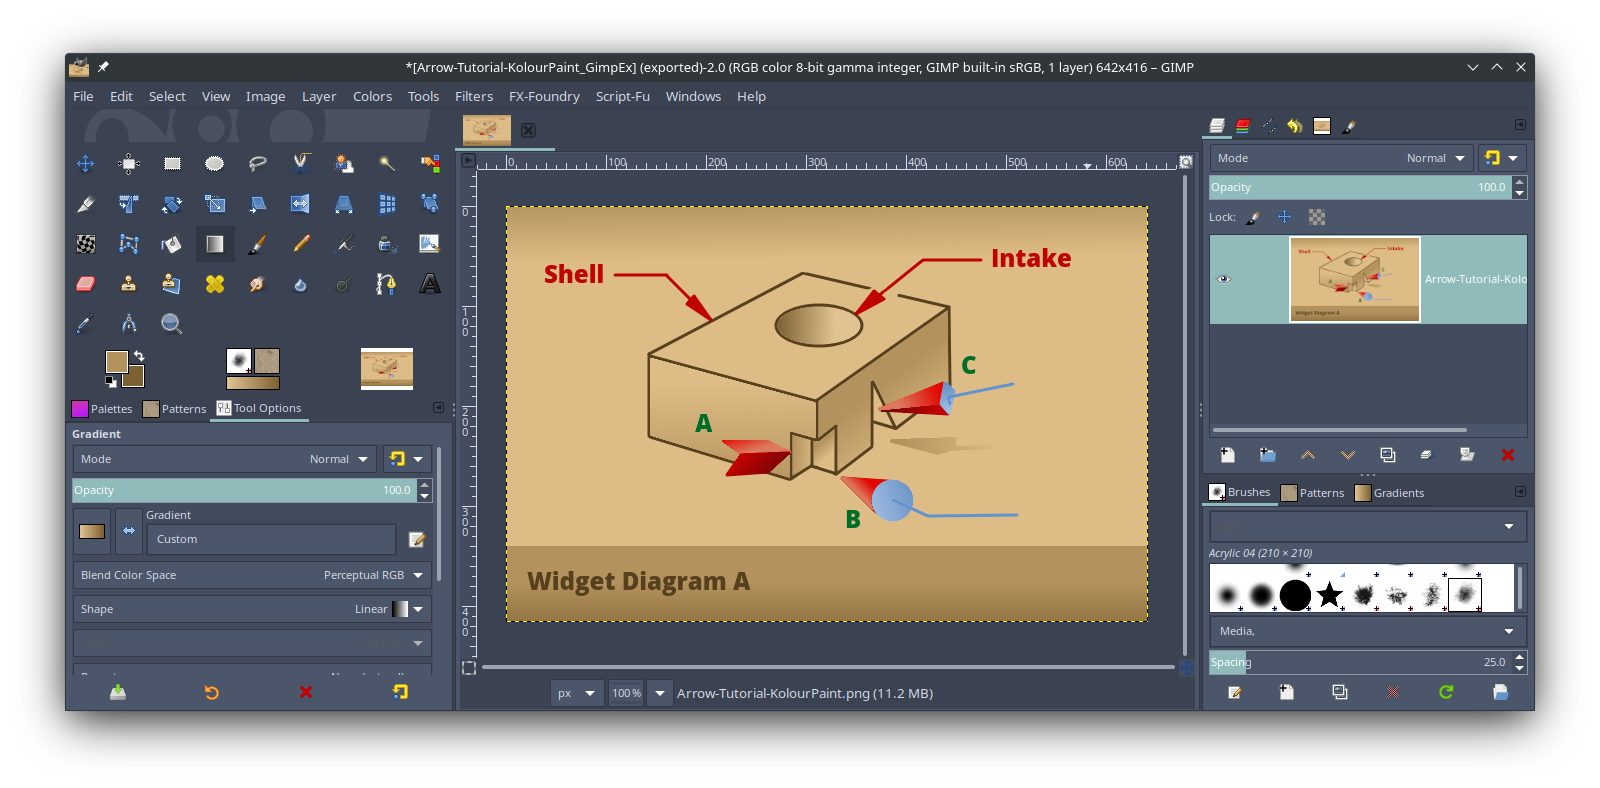
Hint: In Gimp, I set the Gradient tool to use “FG to BG” Gradient, and then simply picked different foreground & background colors to work with, in the color selector at the bottom-left area of the toolbar. I didn’t use any of the built-in gradients.
I also adjusted the tolerance of the Free Select Tool, to select only the areas I wanted to fill.
GIMP’s Free Select Tool really seems to love working with KolourPaint’s flat-fill colors!
Tips & Conclusion
Here are some final tips:
- If you’ll be placing a lot of arrows in your KolourPaint image, start by drawing all the lines first. Lines are easier to work with, and may help you decide more easily which colors and line thicknesses you want to work with.
- Another tip for drawings with lots of arrows: It can help to draw a few “template arrowheads” in the corner of your KolourPaint image, or in another separate KolourPaint image window. You can then copy and paste these around your drawing as needed. This will save you lots of arrow-drawing time.
I hope this tutorial helped you learn a new technique in KolourPaint. I find that the Polygon Tool method is really fast, and it’s easy to create arrowheads that look good.
Please note that KolourPaint drawings are only as precise as you make them, so the precision level is up to you! You will need to decide how accurate, precise, and perfect your arrows and lines are…
Enjoy using KolourPaint!